Have you ever needed to change a vendor’s number, merge a vendor with another vendor, or even delete a vendor? Did you know there is a utility in the Accounts Payable module that will let you make these types of changes?
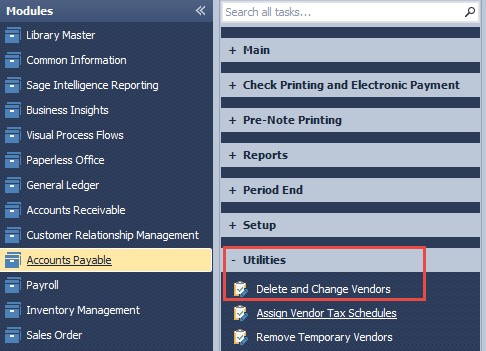
Learn how to use the Delete and Change Vendors Utility in Sage 100 by starting in the Utilities folder in Accounts Payable.
Where is it located in Sage 100?
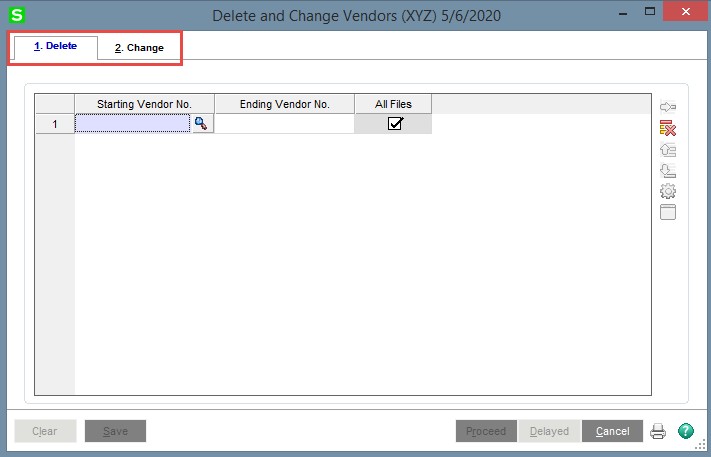
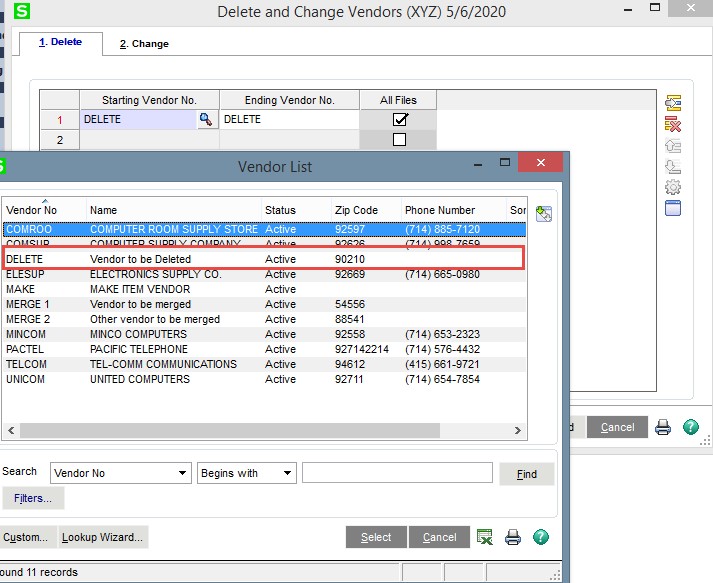
In this example, I have a vendor whose Vendor No. is “DELETE”; I will only be deleting this one vendor.
You can enter a range of vendors, or even use the wild card feature to select a group of vendors, for example if you put in A******* in the Starting and Ending, you would be selecting all vendor numbers that begin with A.
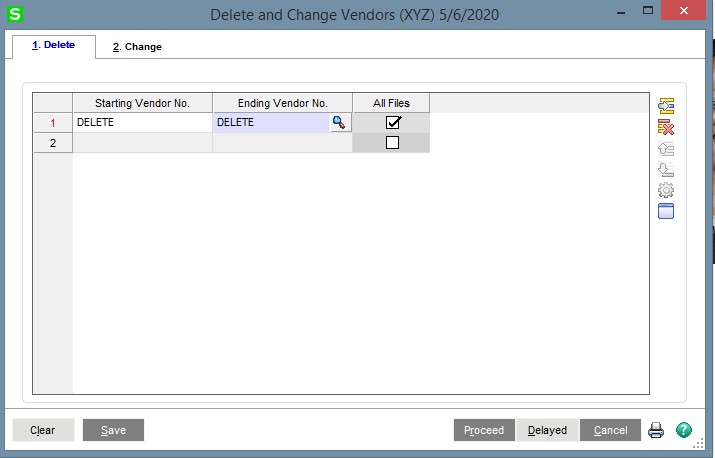
After selecting the vendor, you will click the “proceed” button and receive this message:

To complete the process, you must select “Yes“.

When the report is closed, you will receive a prompt:

Click “Yes” and your selections will be deleted.
Changing and Merging Vendors:
When you change or merge vendor numbers, it is basically the same selection process, except you are using the Change tab.
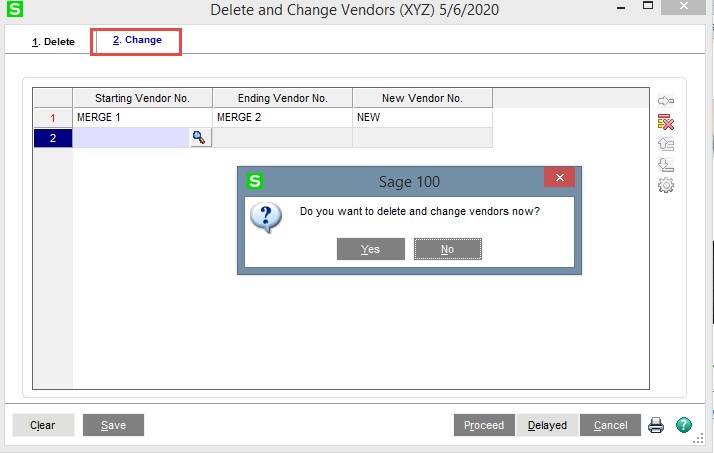
When yes is selected, it will provide the option of viewing the “Change Log“:

The vendors and their associated records have now been merged into the Vendor No. NEW:
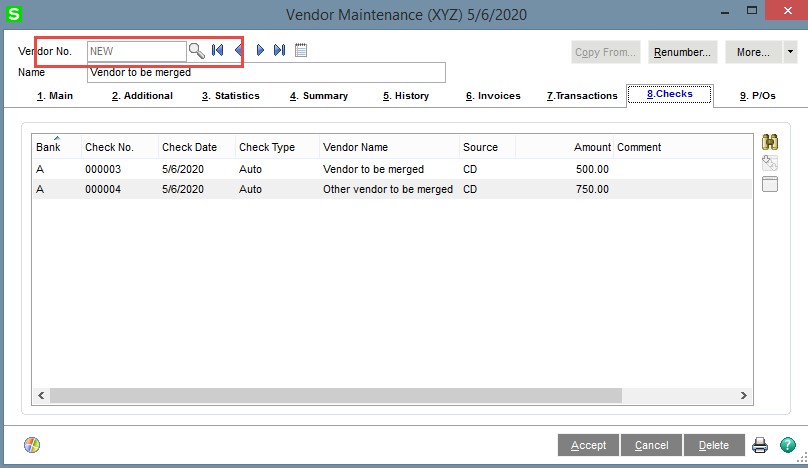
You can re-organize and manage your Accounts Payable Vendors through the Delete and Change Vendors Utility that is available in Sage.
Warning: Please test this process in the test company to become familiar with the processes. Before deleting vendors or processing changes in the live company, make sure that you have a working updated backup of the Sage data.
If you have questions or would like assistance on how to delete and change vendors utility in Sage 100, please contact our Sage 100 support team at 260.423.2414.
Register for our Sage 100 newsletter today!

