
Configuring Employee Direct Deposit in Sage 100
If you’re looking to simplify payroll processing and move away from paper checks, Sage 100’s Direct Deposit feature can help.
View this Sage 100 step by step software tip in a video format (11:29)
View this Sage 100 step by step software tip with individual screen shots below.
Before you begin issuing electronic pay, there are a few required configurations to review starting with enabling Direct Deposit in Payroll Options.
To set up ACH Electronic Payments:
- Go to Payroll > Setup > Payroll Options.

- On Tab #5, turn on the checkmark to “Require Direct Deposit.”

- Require Direct Deposit – Enable this checkbox to allow paychecks to be processed via Direct Deposit
- Direct Deposit Interface
- Sage 100 Direct Deposit Service – this option requires a subscription with Sage. The Direct Deposit data gets synched with the Sage Direct Deposit Service in order to process the employee pay
- Manually Send ACH File – this option generates a NACHA file which you would manually upload to your bank in order to process the employee pay
- Other – use this if you have a third-party interface
- Allow Partial Allocation of Check Amount – Enable this checkbox if you want to be able to process a physical check for an employee in addition to processing pay via Direct Deposit
- Print Direct Deposit Stubs – Enable this checkbox to allow printing Direct Deposit Stubs in lieu of a $0.00 Paycheck
- Next Direct Deposit Stub Number – Unique sequence of numbers, instead of “regular” check numbers. Each Stub Number will start with “D”, indicating that it is a Direct Deposit payment
- Do Not Send a Pre-Note When Employee Number Changes – enable this checkbox to eliminate the prompt to send a prenote for the employee if their Employee Number changes (any form of renaming the Employee ID would constitute an Employee Number change.)
- Path for Direct Deposit File – Specify the folder to which Direct Deposit files are to be saved. If this field is left blank, files will be saved in ..MAS90MAS_xxxPRxxx, where xxx represents the company code (NOTE – the users who will be generating Direct Deposit files must have FULL CONTROL over the folder in which the Direct Deposit files will go).
Configuring your bank account(s) and employees:
- Payroll > Direct Deposit > Direct Deposit Maintenance

- Make sure the Bank Account number is specified (and not masked. Check Role Maintenance for all users who need to generate Direct Deposit files and ensure those roles have PR Security Options to “Allow Viewing, Printing, and Editing of Highly Sensitive Personally Identifiable Information” and GL Security Options to “Allow Viewing, Printing and Editing of Highly Sensitive Personally Identifiable Information” enabled).
- Account type – Checking or Savings.
- Direct Deposit – Enable.
- Pre-Note Approved checkbox – Enable.
- Immediate Destination and Origin – Typically your bank’s routing number.
- Originating DFI – Typically the first eight digits of your bank’s routing number.

Typical settings for the Records and Additional Tab are shown below, unless otherwise specified by your bank.
NOTE – New guidelines are required as of March 20, 2026, regarding the standardized use of specific transaction descriptions for ACH entries.
Fill in the Company Entry Description (as shown below) with the word PAYROLL. This will write the descriptor into the Direct Deposit file per the new requirements.


Configure employees to receive Direct Deposit:
- Payroll > Main > Employee Maintenance

- Enable the Direct Deposit Checkbox.
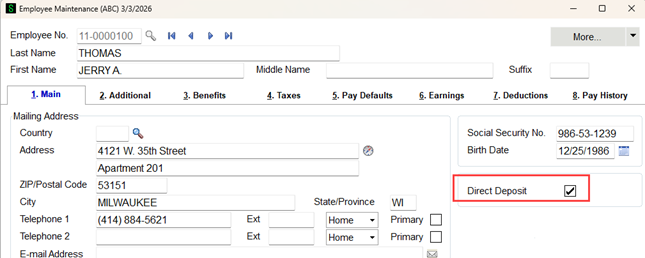
- Click on the More button in the upper right corner. Select Direct Deposit.

- Bank Account No. – Specify Employee’s bank account number(s) into which payment(s) will be distributed
- Routing/Transit No. – Specify Employee’s bank routing number
- Bank Account Type – Specify Checking or Savings
- Bank Description – Enter bank name or you could designate that bank account is checking or savings
- Distribution Method
- Percent of Net Amount or Percent of Gross Amount – Could be any percentage amount. If distributing to multiple accounts, the LAST account should reflect 100%, regardless of other percentages
- Fixed Amount – Enter as dollar amount
- Percent/Amount – Based on Distribution Method
- Pre-Note Sent
- No – Direct Deposit will not be processed for this Employee, and this Employee’s account can be selected to generate Pre-Notes
- Yes – Direct Deposit will not be processed for this Employee, but this Employee’s account is ready for Direct Deposit Approval
- Approved – Direct Deposit can now be processed for this Employee
- Pre-Note Date – When the Pre-Note was created
- Deposited YTD – Cumulative total of dollars for current year paid via Direct Deposit

You can manually set the Employee Pre-Note Sent to Approved, but you won’t have a chance to generate a pre-note file for the bank to confirm not only the Employee information but also your bank information.
- Payroll > Direct Deposit > Pre-Note Selection Register
Note: This function looks at all the employees and selects those for whom a bank account has been configured. Once this register has run, any Employee bank accounts for which Pre-Note Sent was set to NO will transition to YES.

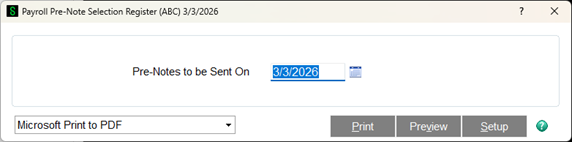

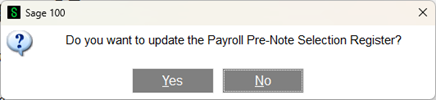
- Payroll > Direct Deposit > Generate Pre-Note ACH File
Note: Run this to create the file to be uploaded to your bank for configuration confirmation.


The Direct Deposit Pre-Note file will be stored in the location specified in Payroll Options.
For more information or assistance with your Sage 100 software, please contact our Sage 100 support team at 260.423.2414.
Register for our Sage 100 newsletter today!
Copyright 2026 DWD Technology Group | All rights reserved. This article content may not be reproduced (in whole or in part), displayed, modified or distributed without express permission from the copyright holder.
About the Author: Mary Hildinger